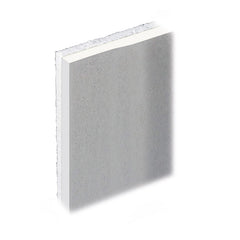
For quick, easy, and long-lasting plasterboard installation, there is no superior method than the direct bonding method. Instead of having to build stud frames, this method allows the direct applying of the plasterboard onto walls using adhesive.
Step-By-Step Guide on Installing Insulated Plasterboard with Direct Bond:
DISCLAIMER: This guide acts as a brief outline for installing insulated plasterboard with direct bond. Be sure to consult a professional before starting your project.
Step 1:
Prepare the walls. To install insulated plasterboard, you should make sure that the walls are clean, dry, and free from cracks, holes, or any other impurities that may affect the bonding process.
Step 2:
Cut the boards to size. Measure the area where you will be installing the insulation and mark the measurements on the plasterboard using a pencil. Cut out the desired area using a straightedge and fine-toothed saw, ensuring that each piece fits perfectly in place before proceeding with the next step.
Step 3:
Apply adhesive to wall. Using an appropriate bonding adhesive, apply a thin layer of adhesive onto both the wall and the back of each board before moving on to step 4. Ensure you cover every inch of both surfaces for maximum adhesion power.
Step 4:
Place boards onto wall. Starting from one corner, slowly position each board onto its place on the wall by pressing lightly against it for a few seconds at a time until it sticks fully into place. Make sure that all four corners line up perfectly with one another before proceeding with this step to ensure proper coverage once completed.
Step 5:
Secure boards into place. Once all boards are installed in place, use screws and anchors to securely fasten them onto your wall so they do not move around or become loose over time due to vibrations or other factors, such as temperature changes in your home environment.
Step 6:
Seal seams between plasterboards together. Use joint tape along all seams between two adjoining pieces of plasterboard to ensure long-lasting maximum strength and durability.
Step 7:
Smooth out imperfections using skim coat. Using a trowel or putty knife, spread an appropriate amount of skim coat onto each seam between two pieces of plasterboard in order fill out any gaps left from previous steps.
Step 8:
Sand down any excess from the skin coat. Once all excess is smoothed out across all seams, take a fine-grade sandpaper and lightly sand down any bumps or lumpy areas left behind.
Looking for more information? For more detailed direction on installing insulated plasterboard and all the products you need, get in touch with our specialised team today.
DISCLAIMER: The contents of this guide are intended for information purposes only. Insulation king shall not be liable, answerable or accountable for any loss or damage resulting from the advice given
